

Project setup
As the Paper team primarily uses IntelliJ IDEA, this guide will be focused on that IDE. However, the steps below should apply to other IDEs as well, with some minor changes.
The Paper team uses Gradle as its build system, and its tools are implemented for Gradle. Most of the code below can be altered to work with other build systems, such as Maven, but this guide will only cover Gradle using the Kotlin DSL.
Follow the guide here to learn how to migrate from Maven to Gradle.
Creating a new project
Section titled “Creating a new project”Open your IDE and select the option to create a new project.
In IntelliJ, you will get the option to select the type of project you want to create - select New Project.
Select Gradle - Kotlin DSL and click Create.
You will land into the build.gradle.kts file where you can add your dependencies.
Adding Paper as a dependency
Section titled “Adding Paper as a dependency”To add Paper as a dependency, you will need to add the Paper repository and dependency to your build.gradle.kts file.
repositories {  maven {    name = "papermc"    url = uri("https://repo.papermc.io/repository/maven-public/")  }}
dependencies {  compileOnly("io.papermc.paper:paper-api:26.2.build.+")}
java {  toolchain.languageVersion.set(JavaLanguageVersion.of(25))}
If you want dynamic latest build version resolution with Maven, you will need to define your
version as a range: [26.2.build,). For a specific build, you can
use the standard variant: 26.2.build.84-stable.
<project>  <repositories>    <repository>      <id>papermc</id>      <url>https://repo.papermc.io/repository/maven-public/</url>    </repository>  </repositories>
  <dependencies>    <dependency>      <groupId>io.papermc.paper</groupId>      <artifactId>paper-api</artifactId>      <version>[26.2.build,)</version>      <scope>provided</scope>    </dependency>  </dependencies></project>
Setting up the src directory
Section titled “Setting up the src directory”To set up the src directory, you will need to create a new directory called src and then create a new directory called main inside of it.
Inside of main, create two new directories called java and resources.
It should look like this:
Directoryexample-plugin/
- build.gradle.kts
- settings.gradle.kts
Directorysrc/
Directorymain/
Directoryjava/
- …
Directoryresources/
- …
Setting up the java directory
Section titled “Setting up the java directory”You will place your Java source files in the java directory. You first need to create some packages to organize your code.
For this example, we will create three packages called io.papermc.testplugin and then create a class called ExamplePlugin inside of it.
Directoryexample-plugin/
- build.gradle.kts
- settings.gradle.kts
Directorysrc/
Directorymain/
Directoryjava/
Directoryio/
Directorypapermc/
Directorytestplugin/
- ExamplePlugin.java
Directoryresources/
- …
Packages
Section titled “Packages”You can see here that the ExamplePlugin class is inside the io.papermc.testplugin package.
A package is a way to organize your code - essentially, it’s a folder. Java packages are used to group related classes.
Oracle has a guide on packages if you want to learn more.
When naming your packages, you should use your domain name in reverse order. For example, if your domain name is papermc.io,
your package name should be io.papermc. If you do not have a domain name, you could use something like your GitHub username.
If you were Linus Torvalds, your package would be io.github.torvalds.
This is then followed by the name of your project.
For example, if your project was called ExamplePlugin, your package would be io.github.torvalds.exampleplugin.
This allows for a unique package name for every plugin.
The main class
Section titled “The main class”The main class is the entry point to your plugin and will be the only class that extends
JavaPlugin in your plugin. It is considered
good practice to not name this class Main. Instead, choose a more descriptive name,
like your plugin’s name. If your plugin is called Example, your main class could be called
ExamplePlugin. An example implementation of this class might look like this:
package io.papermc.testplugin;
import net.kyori.adventure.text.Component;import org.bukkit.Bukkit;import org.bukkit.event.EventHandler;import org.bukkit.event.Listener;import org.bukkit.event.player.PlayerJoinEvent;import org.bukkit.plugin.java.JavaPlugin;
public class ExamplePlugin extends JavaPlugin implements Listener {  @Override  public void onEnable() {    Bukkit.getPluginManager().registerEvents(this, this);  }
  @EventHandler  public void onPlayerJoin(PlayerJoinEvent event) {    event.getPlayer().sendMessage(Component.text("Hello, " + event.getPlayer().getName() + "!"));  }}
Setting up the resources
Section titled “Setting up the resources”The resources directory is where you will place your plugin’s plugin.yml file. See the Plugin YML page for more information.
Using the Minecraft Development IntelliJ plugin
Section titled “Using the Minecraft Development IntelliJ plugin”Alternatively, you can use the Minecraft Development IntelliJ plugin to create a new project.
Installing the Minecraft Development plugin
Section titled “Installing the Minecraft Development plugin”The first thing you need to do is install the Minecraft Development plugin.
You can do this by going to File > Settings > Plugins and searching for Minecraft Development under the Marketplace section.
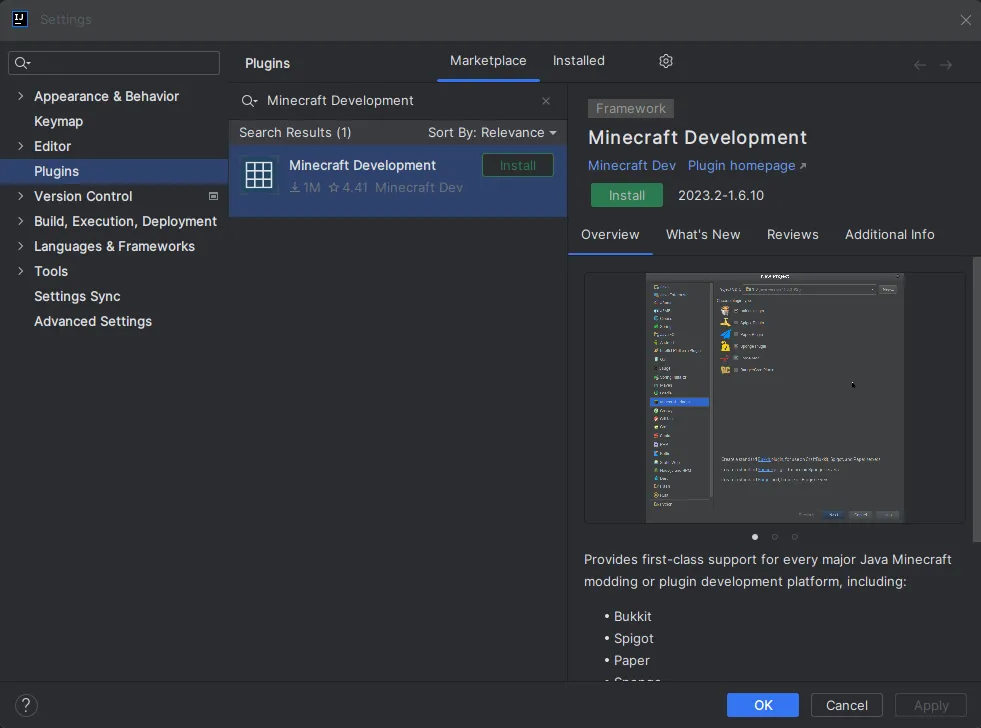
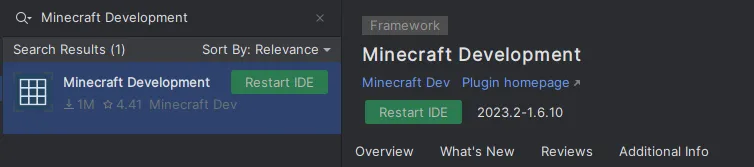
Once you have installed the plugin, you will need to restart IntelliJ.
To do that you can click the Restart IDE button that appears after installing the plugin.
Creating a new project
Section titled “Creating a new project”Once you have installed the plugin, you can create a new project by going to File > New > Project... and selecting Minecraft from the list of options.
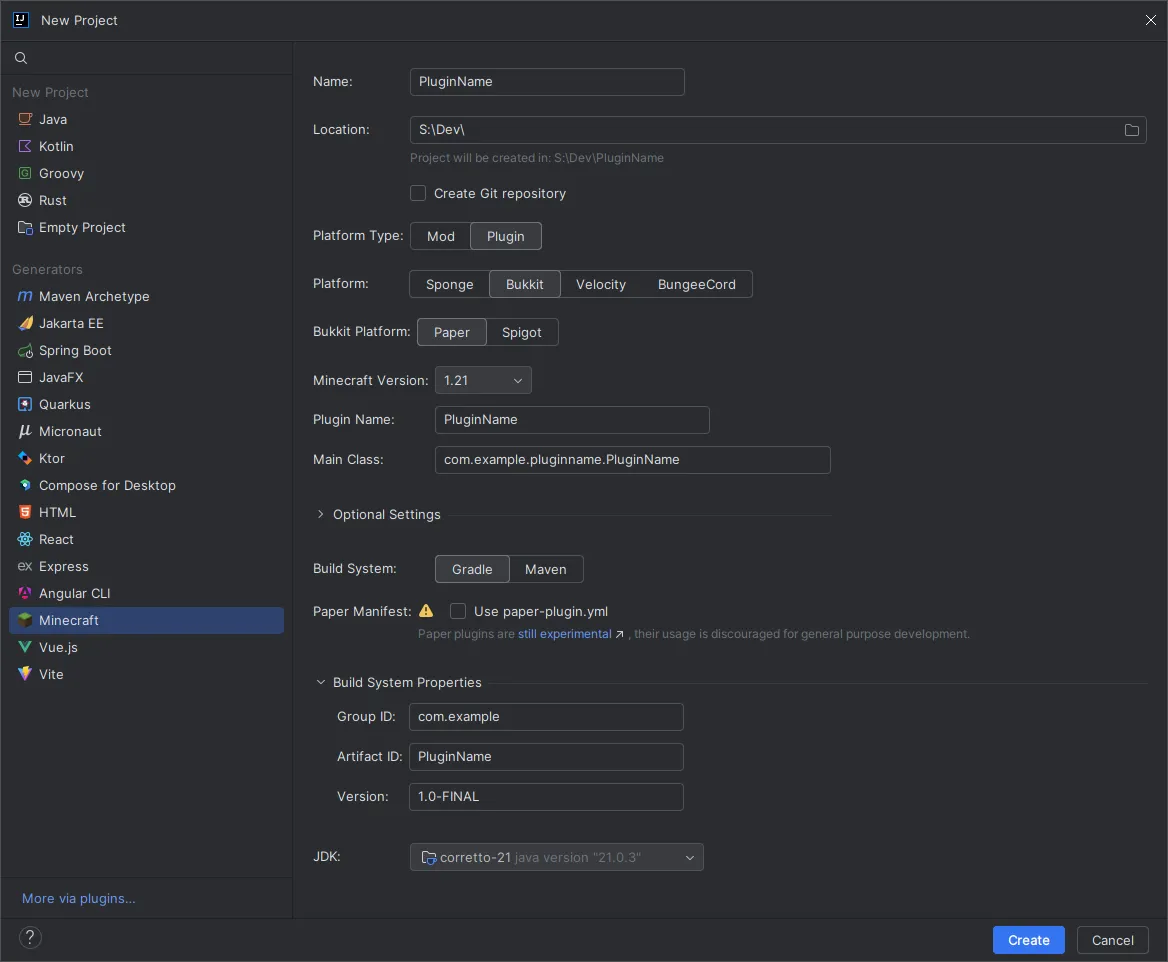
You will be asked to provide some information about your project.
| Field | Explanation |
|---|---|
| Name | The name of your project. |
| Location | The location of your project. This is where the project files will be stored. |
| Platform Type | The platform type you are developing for. This should be Plugin. |
| Platform | The platform you are developing for. This should be Paper. |
| Minecraft Version | The version of Minecraft you are developing for. |
| Plugin Name | The name of your plugin. |
| Main Class | The main class of your plugin. This should be the class that extends JavaPlugin. |
| Optional Settings | Here you can define things like authors, website, description, etc. These are optional and not required for the plugin to work. |
| Build System | The build system you want to use. Paper recommends using Gradle but you can use Maven if you prefer. |
| Paper Manifest | Whether you want to use the new Paper plugins or not. For now this is not recommended as it is still in development. |
| Group ID | The group ID of your project. This is used for Maven and Gradle. This is usually your domain name in reverse. If you don’t know what you should put here, you can use something like io.github.<yourname> or if you don’t have GitHub you can use me.<yourname>. |
| Artifact ID | The artifact ID of your project. This is used for Maven and Gradle. This is usually the name of your project. This is usually the same as the Name field. |
| Version | The version of your project. This is used for Maven and Gradle. This is usually 1.0-SNAPSHOT and does not really matter for now. |
| JDK | The JDK you want to use. This can be anything from Java 25 and above. |
Now you can click on the Create button and IntelliJ will create the project for you.
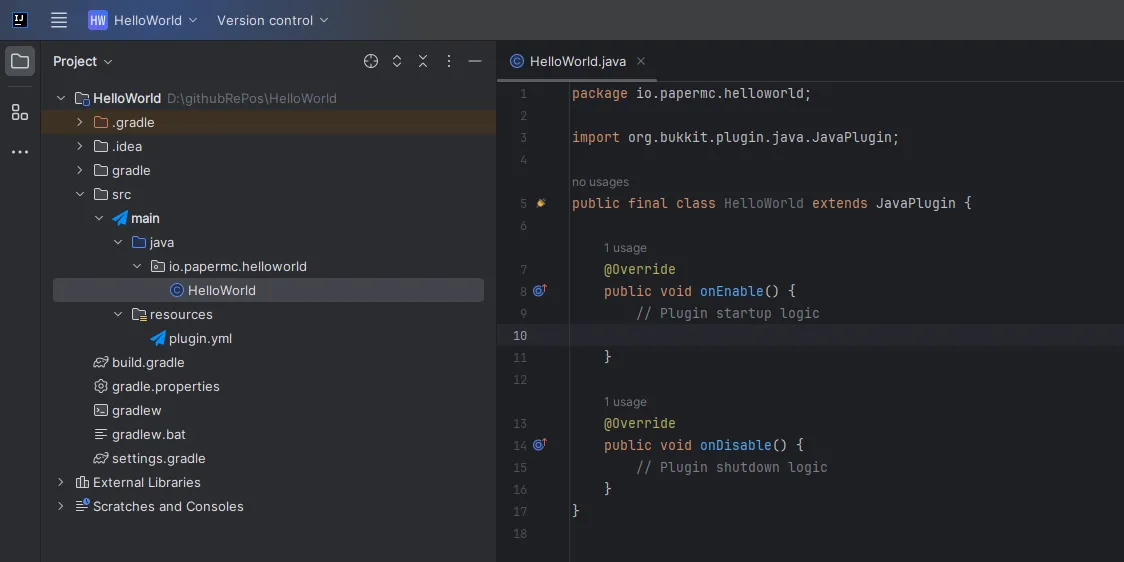
If everything went well, you should see something like this:
Conclusion
Section titled “Conclusion”You should now have a project set up with Paper as a dependency. All you have left to do now is to compile your plugin and run it on a Paper server.